Beauty · All levels
Apply nail veneers with a clean, confident technique
A self-paced programme that teaches you how to prepare, apply and remove nail veneers without filing or acetone.
- 22 recorded video lessons
- Step-by-step application demos
- Materials and supplier checklist
- Self-paced, lifetime access
- 14-day money-back guarantee
Why nail veneers feel harder than they look
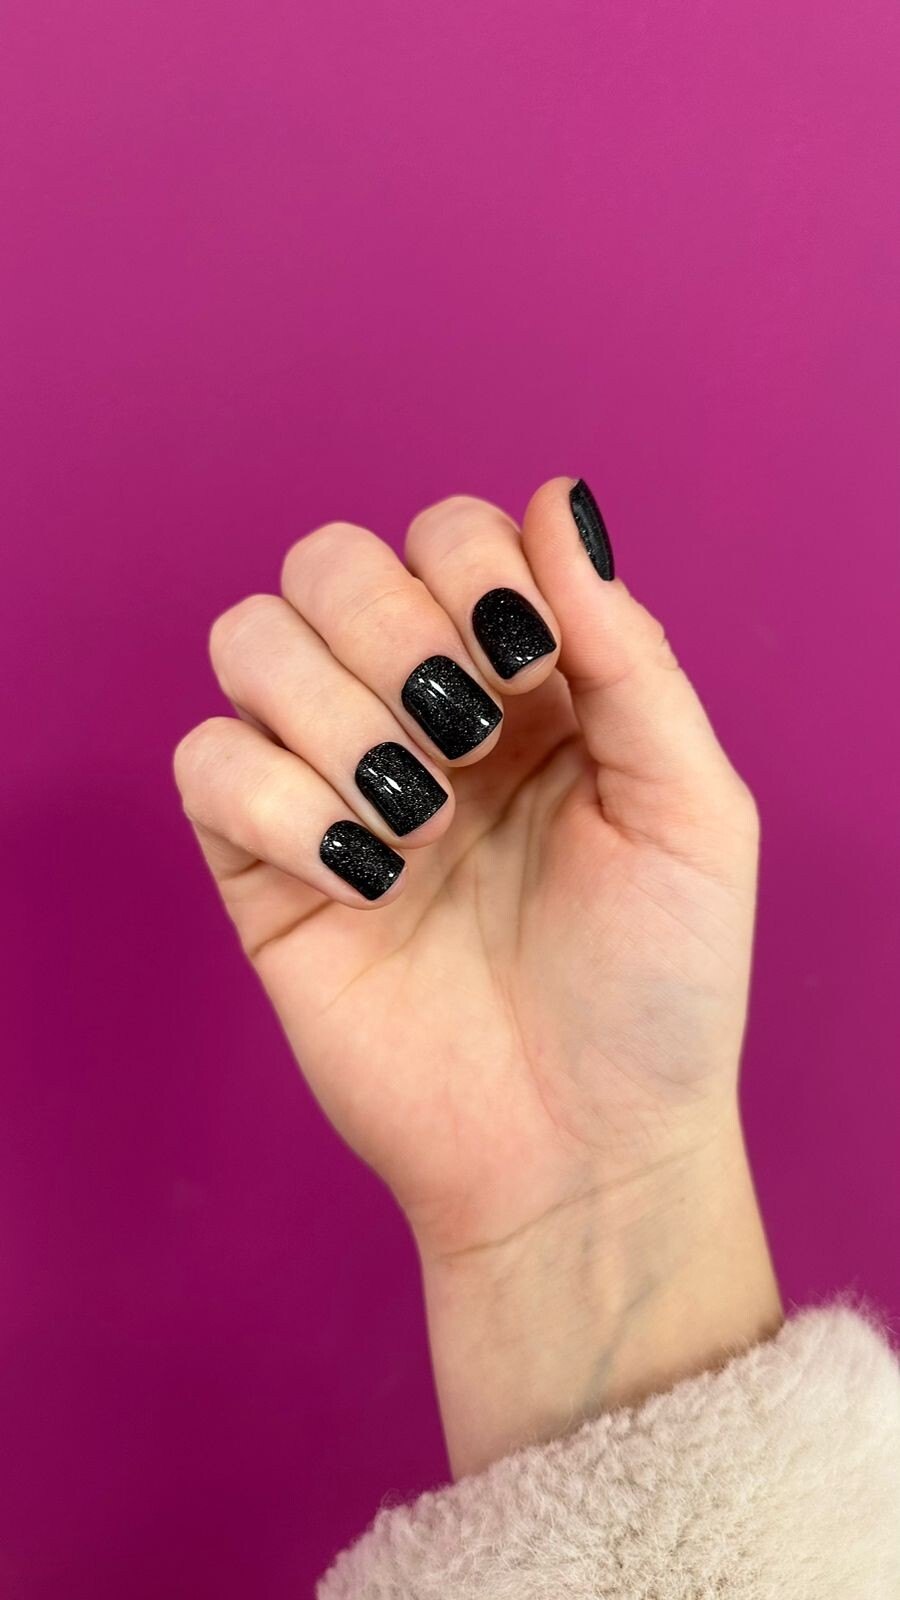
You have seen the finished result: a smooth, glossy or matte nail surface with crisp colour and no bulky edge. What is harder to see is the sequence behind it — how the natural nail is prepared, how the veneer is sized, how the layers are cured and how the whole service comes off cleanly when the client returns.
Many technicians learn veneers by copying short videos and then run into the same problems: lifting at the sidewall, a thick free edge, bubbles under the surface, or a removal that takes far longer than expected. The product is not difficult, but the order of work matters. A small mistake in preparation or placement shows up days later.
This course gives you the full method in one place. It starts with what a veneer is and how it differs from gel polish, tips and wraps. Then it moves through product layers, nail preparation, sizing, application, curing, finishing, removal and aftercare. Each step is demonstrated so you can see the pressure, placement and timing rather than guess from a written description.
The programme is built for beginners who want a reliable first technique and for working technicians who want to add a no-file, low-odour service to their menu. You work at your own pace, practise on a model or practice hand, and return to the lessons whenever you need a refresher.
What you will be able to do
By the end of the course, you will have a repeatable process from consultation to finished set.
- Prepare the natural nail without filing
Clean, shape and dehydrate the nail plate while keeping the surface intact.
- Choose the right veneer size and shape
Match the veneer to the nail width and adjust the free edge before application.
- Apply the fix layer and veneer evenly
Control the amount of product so the veneer sits flat without bulk.
- Cure and finish without a thick edge
Seal the sides and free edge for a smooth result that looks natural.
- Remove veneers safely with oil
Use the removal method that avoids acetone and aggressive filing.
- Explain aftercare to clients
Give clear home-care instructions that help the finish last.
- Price and present veneer services
Build a service description and price that reflect your time and materials.
- Set up a mobile veneer kit
Work with a compact lamp, veneers, fix, top and removal oil.
- 22
- video lessons
- 6
- course modules
- 1
- guided practice project
- 14
- day refund policy
The no-file, low-odour method
The course teaches a layered veneer system: a fix layer for adhesion and protection, a flexible veneer for colour and shape, and a gloss or matte top for the finish. You learn what each layer does and how much to use, so the result stays thin and comfortable.
Because the service does not rely on filing the natural nail or soaking in acetone, the workflow is compact. A mini lamp, a small selection of veneers, two composites and removal oil are enough to begin. That makes the method practical for salon technicians, home studios and mobile appointments.
The lessons show the full sequence in real time: consultation, preparation, sizing, placement, curing, finishing and removal. You see where to hold the veneer, how to press it without trapping air, and how to check the edges before the client leaves.
- A clear step-by-step application sequence
- Guidance on product amounts and curing
- Removal with oil instead of acetone
- A compact kit you can take to clients
How the course works
The course is fully self-paced and delivered as recorded video lessons. There are 22 lessons across six modules, plus a downloadable theory manual that summarises the key points. You can watch a demonstration as many times as you need, pause before a step and replay it while you practise.
Each module ends with a short self-check assignment. You may be asked to photograph your preparation, check the fit of a veneer before curing, or record your removal process. These assignments are for your own review; they help you spot the small errors that are easy to miss when you are working alone.
The course does not include live sessions or personal supervision. It is a recorded programme designed to be studied independently. You will need to source your own veneers, fix, top, lamp and removal oil; the course includes a materials checklist so you know what to buy and what can wait.
The programme
Six modules take you from the basics of nail veneers to a complete, repeatable service.
1Module 1 — Foundations of nail veneersWhat veneers are, where they fit in the nail market and how they compare with other coatings.4 lessons
- How nail veneers entered the nail service market
- What a veneer is and what it is not
- Nail plate structure and how a veneer sits on it
- Veneers compared with gel polish, tips and wraps
2Module 2 — Product science and safe handlingThe layers inside a veneer system, how they cure and how to store your products.4 lessons
- The layers inside a smart veneer
- Base, fix and top: what each layer does
- Choosing and using a UV or LED lamp
- Storing veneers and keeping your workspace organised
3Module 3 — Preparation and applicationThe core practical sequence: consult, prepare, size, place, cure and finish.5 lessons
- Client consultation and nail suitability check
- Preparing the natural nail without filing
- Sizing and shaping the veneer to the nail
- Applying the fix layer and placing the veneer
- Curing, sealing and finishing the edges
4Module 4 — Removal, aftercare and troubleshootingHow to take veneers off cleanly and help clients look after the finish.4 lessons
- Removing veneers with oil in five minutes
- Cleaning and inspecting the natural nail after removal
- Client home-care instructions that protect the finish
- Common application faults and how to correct them
5Module 5 — Pricing, positioning and client experiencePresent veneers as a premium service and explain the difference clearly.3 lessons
- Positioning veneers as a premium service
- Setting a price that reflects your time and materials
- Explaining the difference to clients without overclaiming
6Module 6 — Building a repeatable practiceSet up your kit, workflow and visual records so the service fits your business.2 lessons
- Creating a mobile veneer kit and workflow
- Photographing your work for social media and client records
What you get
Everything is delivered digitally and can be studied from any device.
- 22 recorded video lessons
A complete theory and demonstration library covering the full veneer service.
- Downloadable theory manual
A written summary of the key points for quick reference while you practise.
- Step-by-step application demonstrations
See preparation, sizing, placement, curing and finishing in sequence.
- Removal and aftercare scripts
Clear wording you can use with clients before and after the service.
- Materials and supplier checklist
Know which veneers, composites, lamp and removal oil to source.
- Pricing worksheet
Work through your costs, time and service positioning.
- Self-check practice assignments
Short tasks that help you review your own technique after each module.
- Ongoing access to the lessons
Return to the course area whenever you need a refresher.
Is this course for you?
This course is for you if…
- Beginners who want a structured first course in nail veneers
- Working nail technicians adding a no-file service
- Mobile technicians who need a compact kit and workflow
- Salon owners who want to train a team on a consistent method
- Technicians looking for an alternative to gel polish and tips
Probably not a fit if…
- Anyone looking for live hands-on supervision or personal coaching
- Technicians who want a course that supplies a full physical starter kit
- People seeking care for a diagnosed nail condition
- Anyone expecting guaranteed income or instant client demand
- Students who prefer written theory without video demonstrations
After the course
You will be able to take a client from consultation to finished veneer in a predictable sequence. You will know how to check that the nail is suitable, prepare it without filing, choose the right veneer size, apply the layers evenly and finish the edges so the result looks clean.
You will also know how to remove the veneers with oil, inspect the natural nail afterwards and give aftercare instructions that make sense to the client. On the business side, you will have a pricing worksheet and a clear way to describe the service without overclaiming.
The aim is not to make you dependent on a script. It is to give you a method you can repeat, adjust and improve with practice. Once the sequence is familiar, you can work faster and make better decisions about fit, product amount and finish.
Questions before you buy
How much time do I need each week?
Most students study for two to four hours a week and complete the course in about a month. Because the lessons are recorded, you can move faster or slower depending on your schedule.
Do I need previous nail experience?
No. The course starts with the foundations and explains the products and tools before moving into application. Working technicians can skip familiar sections and focus on the veneer-specific steps.
What do I need to practise?
You will need nail veneers, a fix layer, a top coat, a UV or LED lamp and removal oil. A practice hand or a model is useful for the application and removal exercises. The course includes a materials checklist so you can source the right items locally.
How do I access the course after payment?
You receive access to the course area after checkout. The lessons are available online, and the manual and worksheets can be downloaded for reference.
Is there any live practice or coaching?
No. This is a recorded self-study programme. You learn through video demonstrations, the theory manual and self-check assignments. There are no live sessions or one-to-one coaching calls.
What format are the lessons in?
The lessons are recorded videos with supporting written materials. You can pause, replay and return to any lesson. The course is designed to be studied on a phone, tablet or computer.
How long do I keep access?
You keep ongoing access to the course area and can download the manual and worksheets. The material stays available so you can revisit it when you need a refresher.
Are the veneers and tools included?
No physical starter kit is included. The course provides a materials and supplier checklist, but you purchase the veneers, composites, lamp and removal oil yourself.
What is the refund policy?
You can request a refund within 14 days of purchase. Contact support from the email address used at checkout and we will process the request according to the refund policy.
Will this course guarantee more clients or income?
No. The course teaches the technique, pricing and service positioning, but it cannot guarantee client demand or income. Results depend on your practice, local market and how you present the service.
Start your veneer practice this week
Learn the full sequence at your own pace and return to the lessons whenever you need them.